There can be many reasons that your golf cart isn’t charging, but there are only four main problems that those reasons could fall under, which we are going to investigate in this discussion.
Your golf cart may not be charging because you have a battery problem, your charger itself is faulty, the connections on the batteries, wiring, or charger cable are faulty, or there are faults with the golf cart electronics.
Let’s examine each of these issues independently so you can troubleshoot in a sensible and logical process and then find out what the problem is, what’s causing it and how to fix it. I some cases, you may need to take your cart to a service provider for repair.
Reason No.1: Golf Cart Battery Problems And How To Check Them
Golf carts run on either 48V or 36V and some newer ones 72 volts and usually have 6 volt, 8 volt, or 12 volt batteries to power them. They have a configuration of either 6X6V batteries or 8X6V batteries. Some carts have 3 x 12V batteries for the 36V version and 4 X 12V batteries for the 48V version.
When your golf cart isn’t charging, the first place to check is the batteries, as more often than not, this is where the problem usually lies. Most golf carts use lead-acid batteries, some are sealed batteries, and some are wet and need distilled water top-ups, and some golf cart owners have switched to lithium-ion, even though they are more expensive.
If you find your golf cart isn’t charging, the first place to look is the batteries. The charger may be working, but if there isn’t enough voltage in the batteries, the charger may not work correctly, and it may seem like the charger isn’t working, when in fact, the batteries are to blame.
Let’s look at the battery issues and how to fix them.
Your Cart Has Been Sitting For Long
Leaving your golf cart sitting for long periods, especially in very hot or cold weather, can lead to your batteries losing charge and being unable to pick up a charge as they don’t have enough voltage to click the charger on.
As we said before, the batteries need to have a small voltage to work, and if they are flat or don’t have enough charge, the charger will not register the connection and won’t be able to charge the batteries.
When this happens, the first reaction is that the charger has failed, but often that is not the case.
Always keep your batteries topped off through the wintertime and lever go 30 days without charging.
How To Fix This Problem
There is every possibility that could end up replacing batteries depending on the level of damage done, but we will discuss testing batteries a bit further on.
To fix this problem, you need to instill some charge level in the batteries so that the charger can register and click on them to charge them. Since your charger isn’t working, you may need to use a general battery charger like our favorite on Amazon before using your golf cart charger. Each battery will need to be fully charged separately.
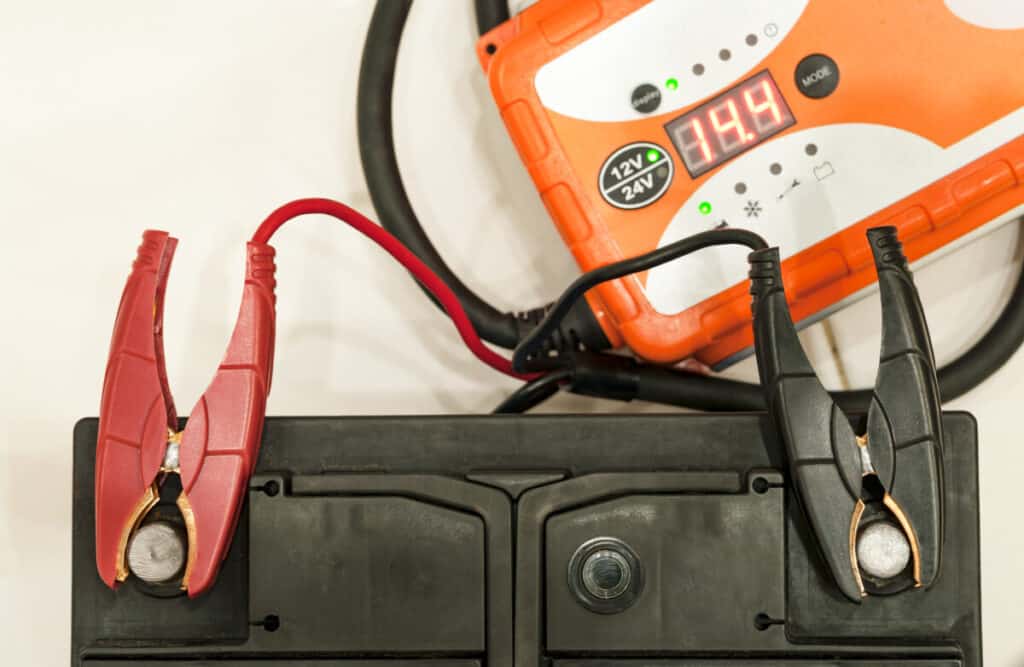
Never get the voltage enough by only charging 1-2 batteries and then plugging your golf cart charger in to solve this solution. This will result in unbalanced batteries. When doing this, always charge each battery one at a time.
You can also make use of a multimeter if you have one to check the battery voltage and see how much charge each has. Batteries need to total about 25V – 30V as a minimum for the charger to react and start working.
You may need to top up the acid levels in the battery. If your golf cart is using a Flooded Lead Acid battery, the acid levels may have dropped, so you need to check and see if the levels are low and the plates are showing.
Don’t fill the battery above the plates as it needs space for the liquid to expand, so you need to be very careful not to get the acid on your skin or in your eyes, so protective gear is recommended.
If they are, then top up the battery (usually with distilled water) and see if that works on the charger; if the charger still doesn’t pick up the batteries, you may have damaged the cells and need a replacement.
Your Golf Cart Battery Charge Is Depleted
When golf carts are driven and used to the point where the batteries are discharged below the recommended levels, they will struggle to charge as they don’t have enough voltage left in them. Follow the steps above to charge each battery one by one to bring up the voltage.
What Are The Types Of Golf Cart Batteries
Many golf carts use Floating Lead Acid batteries, which require topping up because they are the cheapest and most readily available. There are also sealed lead-acid batteries that are either Gel or AGM (Absorbed Glass Mat), which are types of sealed lead-acid batteries.
The main difference between FLA and the Gel and AGM batteries is that Gel and AGM are sealed and essentially maintenance-free. Even though they are more expensive than FLA, the lack of maintenance and better performance persuades many golf cart owners to use them.
The other type of battery is Lithium Ion Phosphate or Lithium-Ion. While these are much more expensive than lead-acid batteries, they last longer, are lighter and can be discharged to greater levels than their lead-acid counterparts.
Discharge Levels On Lead-Acid Vs. Lithium-Ion
Here is where the use of the battery and discharge levels play a role in the battery health as lead-acid batteries should only be discharged to a maximum of 50% capacity; beyond that, they can rapidly lose performance and reduce their ability to charge. If you bring your capacity less than 50% just once you can prematurely damage your batteries.
With lithium-ion, that level is 80%, and that is why more and more cart owners are looking to lithium-ion to replace lead-acid batteries.
Driving your cart until it is flat is not recommended, as you may end up depleting the batteries so much that you may need to replace them. Golf cart batteries are not designed to be discharged that often and so deeply; this is why they should be recharged after each round to avoid depletion and the risk of damage.
How To Fix This Problem
Depleted batteries will have minimal charge, which will prevent the charger from operating, as discussed above. You can remedy this by using a general charger to charge each battery separately to boost the charge and then hook it to the charger and see if it works.
If you find your batteries do start to charge, you need to keep the discharge levels at the recommended levels to avoid this situation in the future.
If you find that the golf cart isn’t charging after a few minutes on the general charger, then you may have depleted them too much and will need new batteries.
Your Batteries Have Run Out Of Water
Older golf carts with lead-acid batteries will struggle to charge if the distilled water levels in the battery drop. Remember that distilled water is the medium for the electrolyte reaction, and if that is low, the battery will struggle to recover charge.
Many golf cart owners don’t know what kind of batteries they have or need to be checked, and this can often happen too late when the golf cart fails to charge. You need to know what kind of batteries your cart has, and if they need maintenance, make sure you check them regularly.
Ensure there are no leaks or acid build-up around the battery or in the battery compartment, as this will indicate a leak, which needs to be fixed without delay.
As discussed above, you need to top up or refill your distilled water – and only use DISTILLED WATER for your batteries; never use tap water.
In some cases, depending on the battery, you may add new plates and restore some charging functionality, but if the battery is damaged beyond this, you would have to replace it or them.
Your Batteries Are Old
Even though golf cart batteries are deep-cycle and designed to be charged and discharged thousands of times, there comes the point after around 5-7 years or so – depending on usage- that the batteries lose their charge and slowly begin to depreciate.
When this happens, there are no other choices except to replace them, and if you get that kind of performance from your batteries, you have done very well indeed.
Battery Golf Cart Charging Problems – Summary
When your golf cart doesn’t charge, go through checking the batteries first to establish whether this is the problem. In most cases, charging issues are mainly battery-related, and a quick check could save you some frustration, time, and money.
Whether it’s depletion or sitting for too long, the acid levels are low, or they are just old, this is the first port of call when your golf cart isn’t charging.
If all is well with your batteries, it’s time to move to the connections between the batteries and the golf cart, as there may be issues causing the golf cart to experience charging.
Reason No. 2: Battery Connection Problems
Sometimes, the battery isn’t the issue, but the connections on the battery or between them cause the charging problems.
Because this is an electrical environment, any loose or faulty connections, frayed or old wiring, or residue build-up on the connections or terminals can create issues with current flow.
How To Check And Fix These Issues
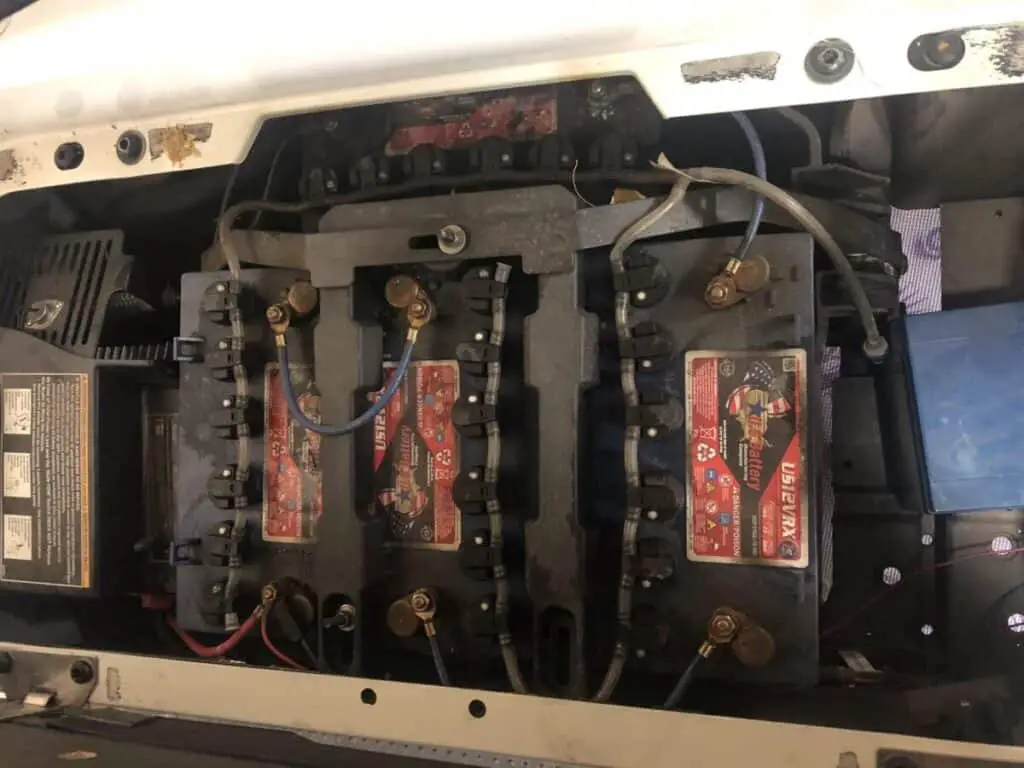
A visual check of connections is the first option for wiring issues. Any build-up around the terminals needs to be cleaned off as this will prevent proper current flow through the batteries and the charger.
Opening your battery compartment, go through each connection between the battery terminals and the connection to the life and the ground wires on the cart to ensure they are tight.
Loose connections can cause an arc effect, which is not conducive for proper current flow between the batteries and the charger and the batteries and the cart’s onboard computer.
Check that each connection is tight on the terminals and that the golf cart wiring is tight. You can remove the connecting cables and wipe the terminals off using a solution of warm water and baking soda.
Pour the solution over the terminals and let it work; you should see some bubbling, especially if there is residue, and then use an old toothbrush to scrub the terminals clean.
You can also use a reputable battery terminal cleaner like CRC’s 05023 Battery Cleaner, and this will not only neutralize the acid (if there is any), but you can wipe it clean with water afterward and get those contact terminals back to pristine condition.
Check For Frayed Wiring Between Batteries & Golf Cart
Many people think that because golf carts run from 12V that the current is less than from a wall socket, which is true. Still, some high amperages and voltages run through the electrical system, and if the wiring is poor, thin, or frayed, it adversely affects the charging and output.
Check each link cable depending on how many batteries you have and the golf cart voltage. A 36V cart may have six 6V batteries, or three 12V batteries, while a 48V cart can have eight 6V batteries, four 12V batteries, or even six 8V batteries.
The link cables connect the negative of the first battery to the positive of the next one and so forth and then complete the circuit by connecting the negative or ground cable of the cart to the last negative battery terminal and the golf cart positive to the first battery’s positive terminal.
Check that both the body of the wire and the terminal connections are tight and clean and that there are no loose strands of wires sticking out or fraying loose.
Check The Wiring On The Charger
Sometimes the wiring on the charger itself can be frayed or have a loose connection in the cart plug connection. If your golf cart isn’t charging, you need to check that the wiring on the charger is good.
Suppose you see any part of the wiring showing wear and tear or see the wire strands through the plastic outer casing. In that case, this may mean that there is a faulty connection that is causing the wire to heat up, and any time there is heat build-up, this will reduce the efficiency of the wire to conduct charge.
Don’t forget to check the charger connection to the wall socket and to the cart as well, as if the wiring to the plug has been stretched or pulled, it may only have an intermittent connection or not be able to accommodate the total charge.
Reason No. 3: Your Golf Cart Charger Is Faulty
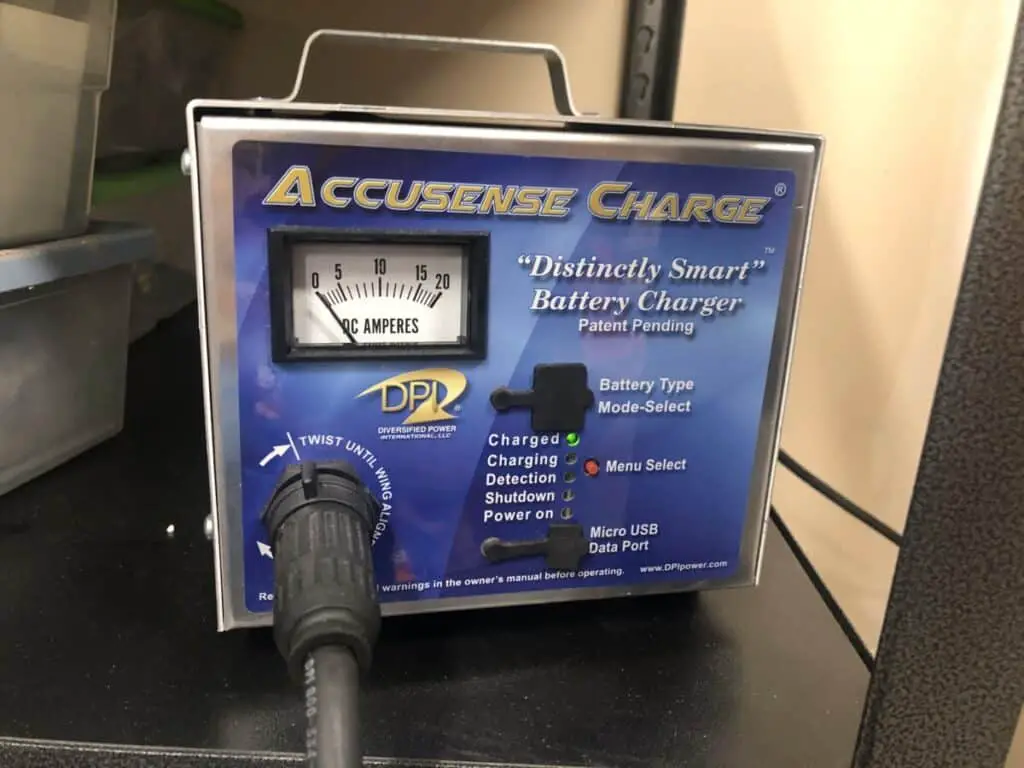
The next step is to check the golf cart charger itself. There may well be no problem with the wiring or the batteries, but the charger itself may be having issues, and this is the reason your golf cart isn’t charging.
A golf cart charger should last as long as your golf cart, but sometimes, the electronics inside the charger can fail, which will stop your golf cart from working.
We had to replace the charger for our cart as it was not functioning properly. We replaced it with this model and it has worked great for us.
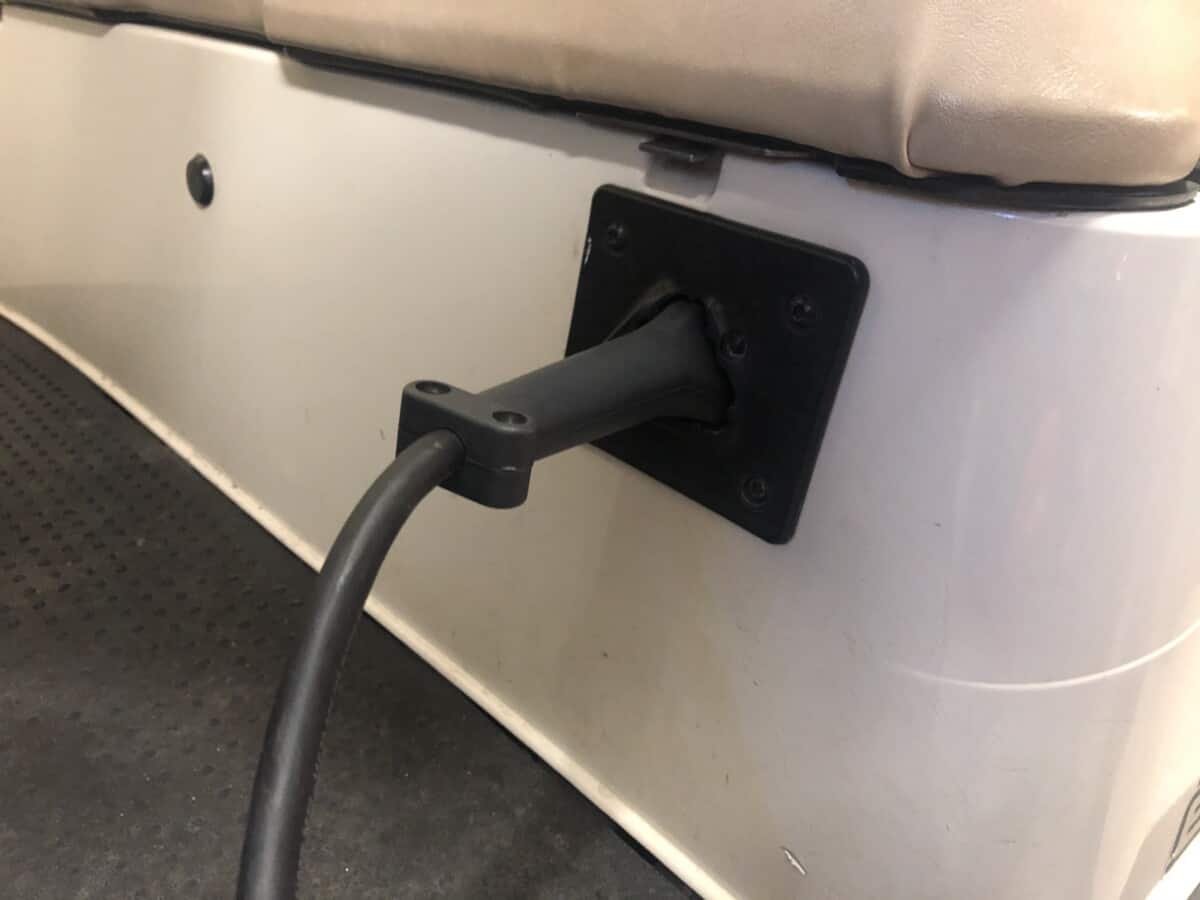
Check The Golf Cart Plug Pins
Most cart chargers plug into the cart using a three-pin connector. Sometimes the connector pins can become indented into the connector body and not make good contact, leading to your golf cart not charging or taking longer than usual.
To check this, remove the charger from the wall and inspect the connector and see if the pins are all up properly. Depending on the charger, you may need to either replace that cable or you may be able to pull the pin out using a pair of needle-nose pliers.
Then you can plug the golf cart charger back in and see if it works. If it doesn’t, you may need to contact the supplier or technician to enquire about repairs or replacing the cable.
Check The Charger Fuse
Sometimes, the fuse in the charger may have blown, and it needs to be replaced. If you switch the charger on and you get nothing, make sure it’s plugged in correctly and switched on, and if that is ok, you may have blown a fuse.
Unplug the charger completely to be safe and then locate the fuse holder on the charger. Remove the fuse, see if it’s blown, and then replace it if it is.
Remember always to replace the fuse with the same one you’ve taken out, as the fuse specifications are particular for that charger model. Using the wrong fuse may result in damage and void the warranty.
Faulty Diodes And Circuit Boards
For most people reading this, replacing diodes and circuit boards will be a little too technically advanced, but these issues can lead to your golf cart not charging. If you are not technically capable of checking this, it would better be left to a qualified technician.
This segment is in this discussion as to when all has been checked externally, and your golf cart still isn’t charging, then it may well be internal electronics that could be the cause and so is worth mentioning in this discussion.
Reason No.4: Faulty Golf Cart Components
Now that we have unravelled three of the four reasons, it’s time to explore the final potential cause of why your golf cart isn’t charging, and this is because there may be problems with the golf cart electronics.
The point of this section is to explore the fact that your golf cart may well be charging correctly, but you are misdiagnosing a charging problem when the golf cart doesn’t work or run when it’s really a component problem.
Motor Or Ignition Issues
If all of the issues discussed above are in order, then the final examination needs to be of the cart components like the motor, and sometimes it can be fixed by pushing the reset button or toggling the power with the tow switch.
Sometimes you think it may be the golf cart that’s not charging correctly, when in fact, it can be the motor or other ignition issues.
This can usually be found on the motor itself and near the main power supply.
If this doesn’t work, you will need to test it with another fully charged battery, and if there is no joy, you may have burned the motor out, and the golf cart is charging correctly.
Faulty Solenoid Or Direction Switch
Another potential problem masquerading as a charging issue is a faulty solenoid or direction switch. Even though you may think it’s a charging problem, it is not related.
It may be better to refer them to a qualified technician to resolve solenoid or direction switch issues, especially if you have thoroughly checked the other possible charging problems.
If you don’t hear a ‘click’ when you turn the key, then most likely you have a faulty solenoid, and this can be diagnosed and replaced by a technician, and the same would be valid for the direction switch.
Even though the direction switches are built for thousands of uses, if you drive your cart a lot or bought it used, there will come a time when this switch will fail.
So if you suspect that your golf cart isn’t charging when you turn the cart on and it doesn’t work, your diagnosis may be misguided, and you may not, in fact, have a charging problem at all.
Faulty On Board Charger Circuit
The Club Car brand typically has an on board charging circuit. This can become faulty and cause your golf cart not to charge. This is another item you will need to check to determine if it is a reason your cart is not charging.
Conclusion
Golf cart charging problems are common and will occur at some point in the lifetime of your golf cart. However, if you follow a systematic analysis of the potential issues, you should be able to, at last, identify the problem and, in some cases, fix it yourself.
Please remember that even when working with 12V, you need to take all proper precautions to be safe. If you are not confident to investigate why your golf cart isn’t charging, refer back to your pro-shop or cart service technician to get your cart back in service as soon as possible.